Category Archives: Tutorial

side table refurbish

When I moved to my apartment in Lincoln Park, my mom was able to find me these cheap-o side tables at a garage sale for my living room. While they were in okay shape the past year and a half, they had incurred some damage that mostly can be chalked up to pre-game party fouls (read: wine spills, ring stains, you name it). After taking a class at Vintage Pine about how to use Annie Sloan Chalk Paint, I decided to use these tables as one of my first projects with the awesome paint.

IMG_4694 IMG_5090Both of these tables were wooden and had some unknown leathery/papery tabletop with a gold filigree border. It would look really pretty if they were in good condition, but they just weren’t anymore. For anyone that hasn’t used Annie Sloan Chalk Paint before, it is truly a God-send for furniture painting. Annie Sloan, a French DIY-er, invented it so that a woman could paint a piece of furniture in the morning and have it done by the time her husband came back from work in the evening. It dries sooo fast! I was done with this entire project in 5 hours- and that included minimal sanding, 2 coats of paint and a wax finish. The paint is also water-based, which means that it’s not harmful to breathe in! I actually did this entire project in my boyfriend’s kitchen… thanks to M for letting me use his apartment while he was trying to watch a Marquette game in the next room 🙂

My tables after one coat of Napoleonic Blue paint: IMG_6276IMG_1465

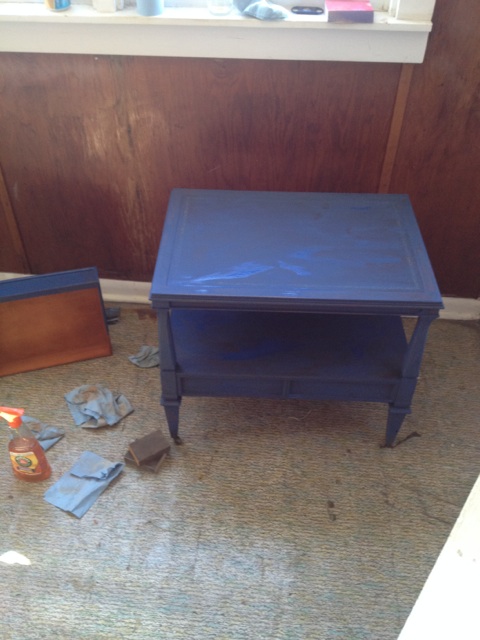
I went to Anthropologie and picked out these knobs for the table that has a little drawer. So cute! here are my tables with before and after shots:

IMG_3945 IMG_5062

The weird leathery tops aren’t perfect but I still love them! Have you ever refurbished  furniture with Annie Sloan Chalk Paint? I would love to see your projects!

Leave a comment

Filed under lifestyle, Tutorial

rust or bust: bar cart makeover

IMG_6411

I found this awesome refurbish of a bar cart on this blog and decided…. I must have one! So I took to Craigslist and was able to find this rusty ol’ bar cart for $30. Kind of annoyed that I payed $30 for this piece of junk since obviously a ton of work would have to go into it. But, the guy was asking $40 so I’m glad I didn’t pay ‘full price’.

IMG_2234

My first step was to enlist my Dad in drilling holes for the handles that I bought at Ikea. I bought the LANSA handles because they were pretty cheap and they were deep enough to be able to hang a cute little handtowel on the end. My dad drilled the holes and then I kept working.

IMG_2415

Then I set off to try to remove all the rust. I did this by sanding the top of this cart vigorously with coarse sandpaper and then with fine sandpaper. It took a while but I finally got all (well,most) of the rust off. Then, I took the cart apart and began spraying. I went with sort of a pastel mint paint. The spray paint I used had a matte finish and included a primer. It was pretty easy to cover and coat, but I did use two bottles. I also used additional primer on the top shelf because there was minimal rust left over and  I wanted to make sure it was fully covered by the paint.

IMG_8031

I used two coats of paint and opted for keeping the legs of the cart unpainted- I love the look of the chrome! My handles also are silver/chrome so I thought they would all complement each other. Also going to use mostly silver hardware on the cart so I liked the idea of coordinating everything.

Here she is:

IMG_4689

Placement in my apartment:
IMG_0724

Michael showing off his new drink with my new bar cart. Notice my cute little Paris handtowel, courtesy of Home Goods. Now I need a little wine rack for the bottom shelf, a cute ice bucket, and a reason to have friends over. IMG_4634

2 Comments

Filed under lifestyle, Tutorial

25 ways to wear a scarf via wendy’s lookbook

Love this video… It’s so well done! Perfect for fall.

Check out Wendy’s other videos on Wendy’s Lookbook YouTube channel!

Leave a comment

by | September 18, 2013 · 1:56 PM

tuxedo nails

I have been wanting to do this manicure forever! I finally got a chance this week and I am loving them… here is how to do these:

1. First paint white towards the top of your nails. I didn’t do a full coat because I didn’t want the manicure to be really thick.

IMG_30392. Use a striper to paint the lines for the black suit. I used my Orly black striper.

IMG_23323. Fill in your black lines. I use China Glaze’s Liquid Leather.

IMG_99874. Then use the striper again to make the bows and the buttons. It takes time, and my bows didn’t look exactly perfect, but they were still cute! I got a ton of complements on them and I will definitely do them again! I wish I did them for the Shedd Gala!

IMG_4148

IMG_1616

Leave a comment

Filed under nails, Tutorial

framed! ~ diy project

My coworker gave me this amazing huge frame when she was moving out of her house. It is a huge, gold, ornate frame with a Monet oil painting in it. As pretty as the frame and painting were, they didn’t match my living room. Soooo… I decided to attempt a spray paint DIY and re-do the frame. I love it!

IMG_5211

First I took the canvas out of the frame

IMG_9657

Then I set off to Lowes. I bought a spray primer, bright red spray paint, and a glossy top coat. I chose red to match my little Ikea rug. I thought it would make both of the pieces pop!

IMG_1258

Then I had to find somewhere to spray outside 🙂 Thankfully my friends allowed me to use their backyard! I used a plastic dropcloth and primed it, waited about 15 minutes and then sprayed it red.

IMG_1233

IMG_2636

It was a windy day so I had to keep fixing it up because when I walked away the plastic kept flying onto the wet paint! Also… never spray around trees with loose things that can fall on your frame. Oh well… adds character! Then we enlisted Michael to hang up and viola! Finally we have something hanging above my couch!

428672_2615896113706_1282139212_n

IMG_7184

Leave a comment

Filed under lifestyle, Tutorial